@cbh I have managed to find some time and fit the z-wave antenna. Thanks to @Undertaker idea, I have decided to fit a zigbee antenna, too. I didn’t care about Wifi as my router was always in close range.
Below some of the steps I took for such operation.
Needless to say that warranty is totally void should you proceed opening and drilling holes!! (my Homey is about 19 months old)
- Opening the case.
Initial plan was to use Johan’s steps. But then I had a closer look to the dome and learned that the top half was not fitted very well by Athom, with a small less than 1mm gap in between the top half and the middle ring. Just in one side, the rest was fitted well.
So I jammed a knife in that slot on transversal side, and gently rotate the blade until the top half started to detach. I went all the way around until the whole glue gave up. In this way I did not forced the plastic screws as Johann did. No damage at all to the dome or ring.
Dome halves separated.
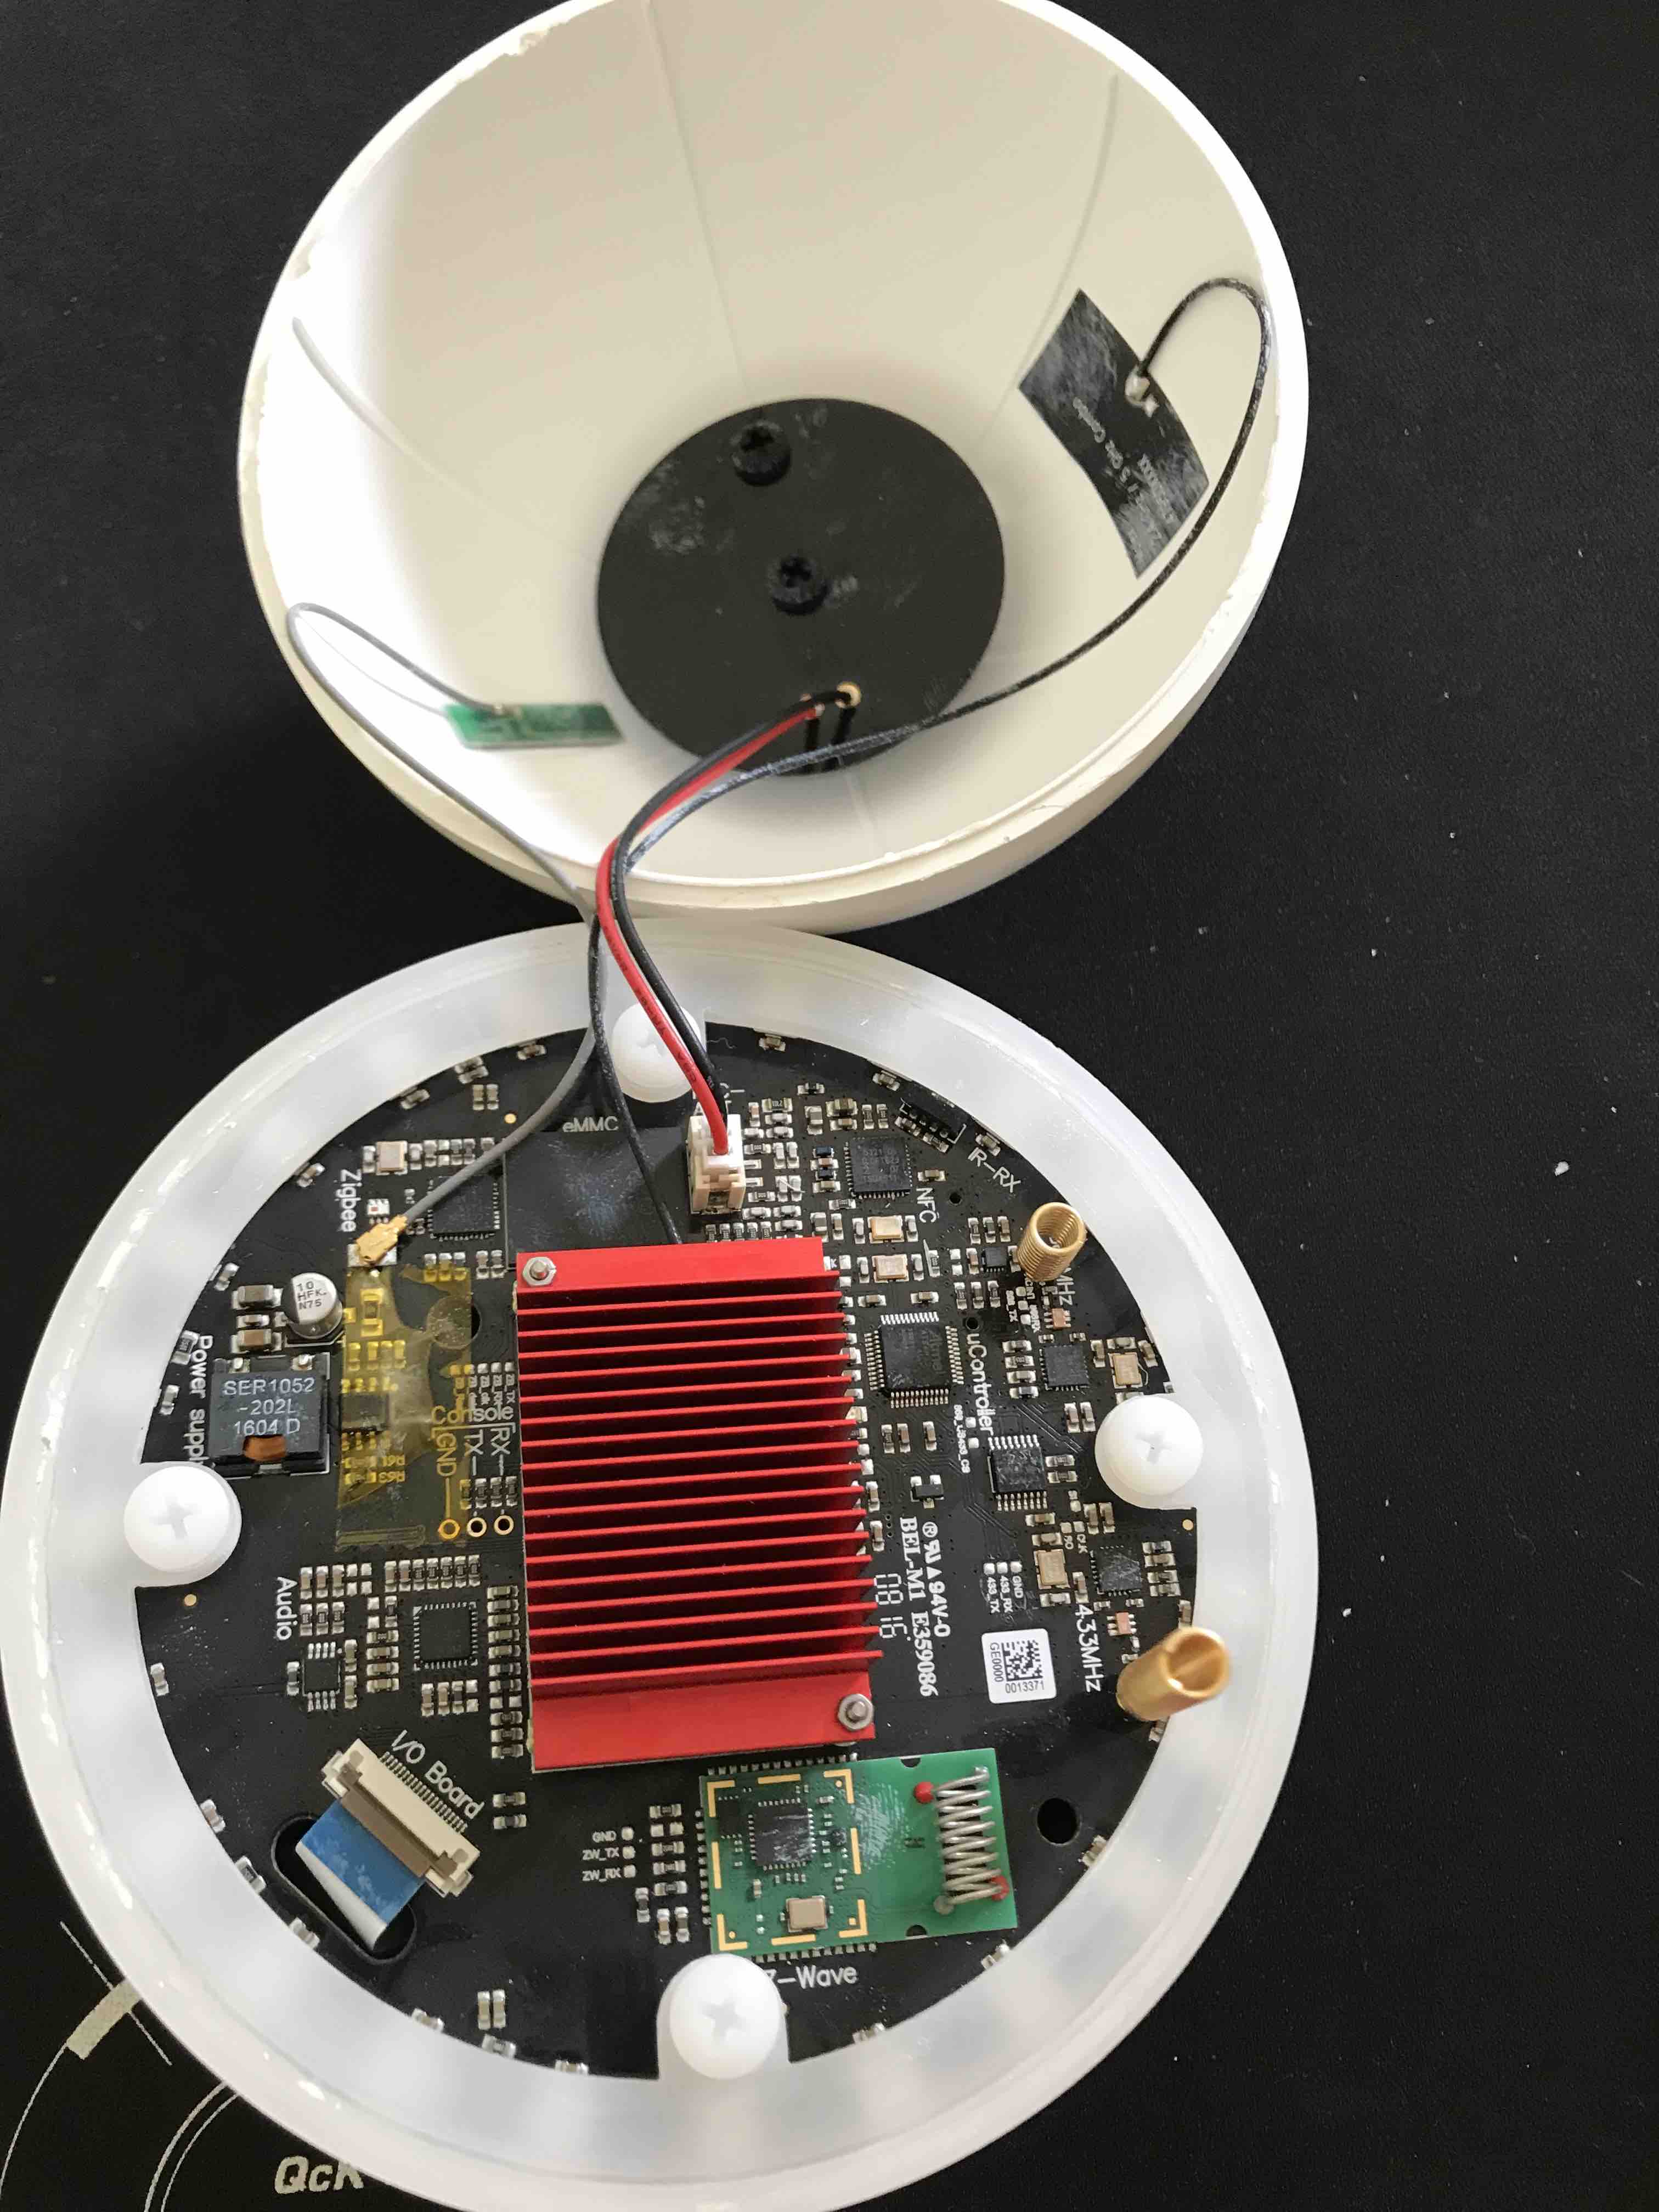

Zigbee u.FL connector with original cable.

Z-wave antenna, the problem I faced: no u.FL connector as this antenna was soldered to the PCB (I knew that from previous photos)

Bottom half dome after the motherboard was removed. By fitting the antenna connectors on the bottom half, Homey looks better as the connectors are hidden. So I planned to drill two holes close to the USB and speaker holes.
- Marking and drilling the holes.
Used a 90degrees ruler to measure accurate so both holes drilled symmetrical.


A couple of marking spots.

Then drilled pilot holes with a 2mm drill bit.
With a 6.5mm drill bit, finished the holes (didn’t take a photo of that…)
- Fitting the two antennas.
Antennas kits. The black one is a 900MHz antenna (for z-wave) and white is a 2.4GHz (for zigbee). I could not find a 900MHz antenna in white


First, z-wave. Since no u.FL connector, I cut off the female u.FL, stripped the cable with a precision side cutters, heat shrink the end (the white bit), run the wire through an existing hole in the PCB and soldered the end to the PCB.

Then zigbee. I isolated the old u.FL connector with a heat shrink so it wouldn’t touch the PCB when all back in place later on.

I ran the zigbee wire though another existing hole in the PCB.

And connected the u.FL connector.

This is how it looks from behind.
- Putting Homey back together.


View from the back. I don’t really want to leave it like that scar with antennas, so I will eventually get a couple of extenders and run all three cable in a nice bunch (2x antennas and power cable). Antennas then will be mounted in a hidden place.

Front view.
What have I achieved? Something that I was craving for over a year from this beautiful device: improved z-wave range! And I mean it!! I could pair two battery powered devices an Aeotec Wallmote and a Fibaro Multisensor from 12 meters away and two wall in between them and Homey (OK, plaster walls and not concrete). I haven’t tried longer distance since that means to go outside as Homey is located kind in the middle of my house.
Yes, I do have some 60+ powered devices around my house which give me a nice mesh network and I can reach even the farther device from Homey.
However, now most of my devices show direct connection to Homey, some via one hope and few only via two hops. All devices respond so fast, not dreaming!
And the best, all the Fibaro multisensors I own, now work as supposed to work as all have direct connection with Homey. Last time I could use those sensors before fitting the antenna, was with HC2.
Hope this helps!
